参考: Tutorial: Building 'Shiny' Applications with R
ui.R
library(shiny)

# Define UI for dataset viewer application
shinyUI(pageWithSidebar(

  # Application title
  headerPanel("Shiny Text"),

  # Sidebar with controls to select a dataset and specify the number
  # of observations to view
  sidebarPanel(
    selectInput("dataset", "Choose a dataset:",
                choices = c("rock", "pressure", "cars")),

    numericInput("obs", "Number of observations to view:", 10)
  ),

  # Show a summary of the dataset and an HTML table with the requested
  # number of observations
  mainPanel(
    verbatimTextOutput("summary"),

    tableOutput("view")
  )
))
ui.Rの構造は、
shinyUI
    pageWithSidebar
        headerPnael
        sliderPanel
            selectInput
            numericInput
        mainPanel
            verbatimTextOutput
            tableOutput
となっている。ブロック単位が明確でわかりやすい。また「位置」の情報は必要なく、ブラウザ画面のサイズにあわせて自動的にレイアウトしてくれる。
server.R
library(shiny)
library(datasets)

# Define server logic required to summarize and view the selected dataset
shinyServer(function(input, output) {

  # Return the requested dataset
  datasetInput <- reactive(function() {
    switch(input$dataset,
           "rock" = rock,
           "pressure" = pressure,
           "cars" = cars)
  })

  # Generate a summary of the dataset
  output$summary <- reactivePrint(function() {
    dataset <- datasetInput()
    summary(dataset)
  })

  # Show the first "n" observations
  output$view <- reactiveTable(function() {
    head(datasetInput(), n = input$obs)
  })
})
"shinyServer(function(input, output) {"に続けて、処置を書く。
input$UI名
で入力を取り出す。例えば、スライダーdatasetの値を受け取るには、
input$dataset
とする。
datasetInput <- reactive(function() {.....} は、reactive関数の部分。この表現は重要。
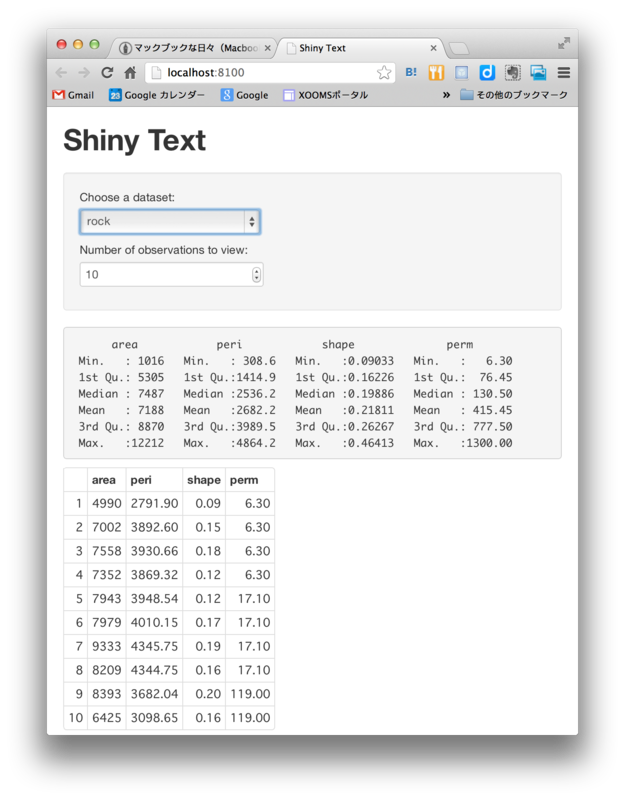
> runApp("フォルダ名")で実行すると、ブラウザで次の画面が表示される。

プルダウンセレクターと数値カウンターの入力は、即座にプロットに反映される。